


BD
Th SDB Classic Special Edition Up Grade
-
Big Daddy
- Shooting true

- Posts: 536
- Joined: Fri Sep 18, 2009 6:54 pm
- Location: Hyderabad
Re: SDB Classic – SE (Special Edition) . 22
Thank you Vikram, I do appreciate your comment. 

BD
BD
The early bird gets the worm, but the fact is, if the worm had woken up late, it would still be alive.

-
Big Daddy
- Shooting true
- Posts: 536
- Joined: Fri Sep 18, 2009 6:54 pm
- Location: Hyderabad
Re: SDB Classic – SE (Special Edition) . 22
Dear moderators,
Just realised I should have posted this topic in the 'air guns' section. May I request you to transfer this post to it's right place. Sorry for the inconvenience.
BD
Just realised I should have posted this topic in the 'air guns' section. May I request you to transfer this post to it's right place. Sorry for the inconvenience.
BD
The early bird gets the worm, but the fact is, if the worm had woken up late, it would still be alive.
-
Big Daddy
- Shooting true
- Posts: 536
- Joined: Fri Sep 18, 2009 6:54 pm
- Location: Hyderabad
Re: SDB Classic – SE (Special Edition) . 22
Hi Lawman,Lawman wrote:
The points of the air rifle has already discussed by BD. So, I am not repeating those as my experience is same. T
Lawman
Nice to know you had the same experience. She's a pleasure to shoot.
BD
The early bird gets the worm, but the fact is, if the worm had woken up late, it would still be alive.
-
Big Daddy
- Shooting true
- Posts: 536
- Joined: Fri Sep 18, 2009 6:54 pm
- Location: Hyderabad
Re: SDB Classic – SE (Special Edition) . 22
Thank you very much Sir ji.ckkalyan wrote:Excellent review Big Daddy and painstaking effort, I am sure! A labour of love? Kudos.
Yes indeed I enjoyed penning down this review as much as I enjoyed the experience with my SDB.
BD
The early bird gets the worm, but the fact is, if the worm had woken up late, it would still be alive.
-
Basu

- Veteran

- Posts: 1483
- Joined: Wed Apr 08, 2009 7:14 pm
- Location: Salt Lake Kolkata
Re: SDB Classic – SE (Special Edition) . 22
Dear Mthayeb,
I was talking to one dealer at Kolkata where it was understood that SDB Classic SE will be available within a month.
Manufacturer is introducing some more modifications.
This model will be reasonably priced ex-Kolkata.
Basu
I was talking to one dealer at Kolkata where it was understood that SDB Classic SE will be available within a month.
Manufacturer is introducing some more modifications.
This model will be reasonably priced ex-Kolkata.
Basu
Not all those wander , are lost...............
-
Big Daddy
- Shooting true
- Posts: 536
- Joined: Fri Sep 18, 2009 6:54 pm
- Location: Hyderabad
Th SDB Classic Special Edition Up Grade
This post is in continuation to the above link which I had unfortunately posted in the wrong section.
Both threads merged - moderator
I would like to refer to the first three points I made in the previous post with a little modification to the third.
Firstly, I would like to make it very clear that all opinions in this post are mine based on my experience.
Secondly, I do not represent, support, promote, demote or market any ones opinions or any air rifle brand.
Thirdly, this post is about a product I have worked on and tweaked to a level that I feel comfortable with, and might or might not necessarily be to its full potential.
Please forgive me for my messy work station as you will witness in some pics.
I had talked about the SDB Classic SE (Special Edition). As I had mentioned, this particular gun, kind of drew my attention. After the initial review, my fingers and mind kept twitching, knowing there was more to this gun than what was present.
I decided to tune and “tweak” the gun to bring out its full potential, both in performance and lust.The improved SDB was going to be a carbine version.
Inspired by the age old classic “My Fair Lady” I set on my quest.
For Gen X members of the forum, this is an all-time classic where a low class woman is “transformed” in to a sophisticated lady, both look wise (this is where I decided the look of the rifle needs an upgrade) and character wise (the internals needed to be re-worked).
I’m sure the older folks have that little curl up their lips…..yes…My fair lady, Sound of music…Gone with the wind…my my…I’m getting diverted…nostalgia.
Armed with a plan in mind, dismantled the rifle. I was in for a rude shock. The internals looked like a bombed out war zone.

How on earth did this rifle perform so well?
The moment I saw the internal, I was excited. There was definitely scope to outperform its already great performance.
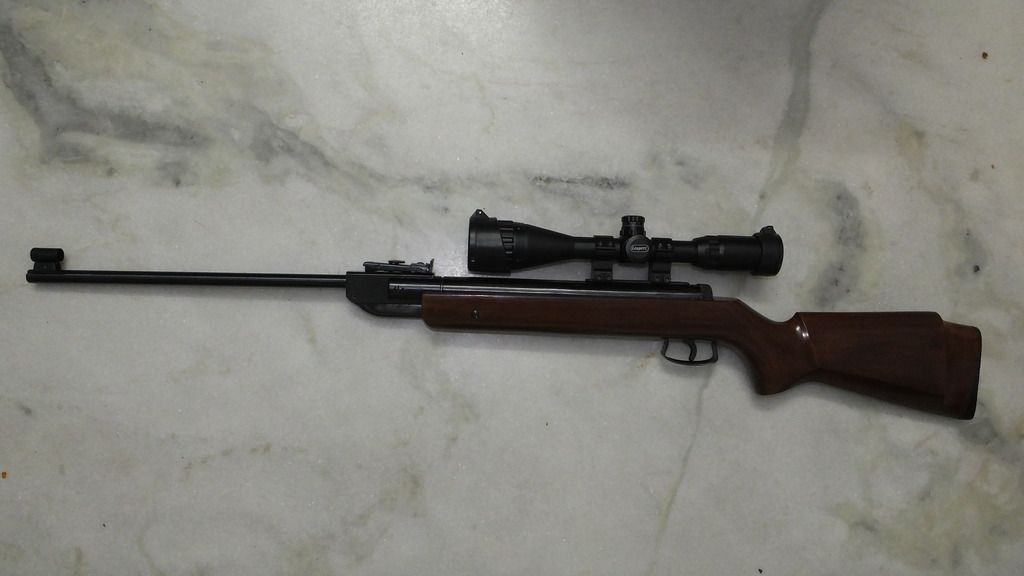
This Lady is the SDB Classic Special Edition in her original self (first review).
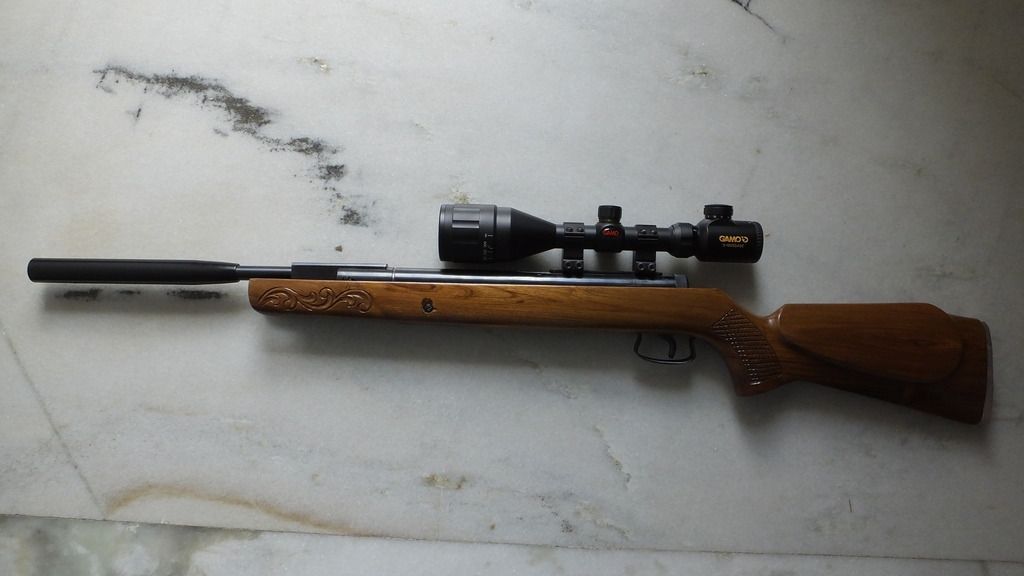
The same Lady after refinement
Now, lets look into what went into her transformation.
Firstly the externals.
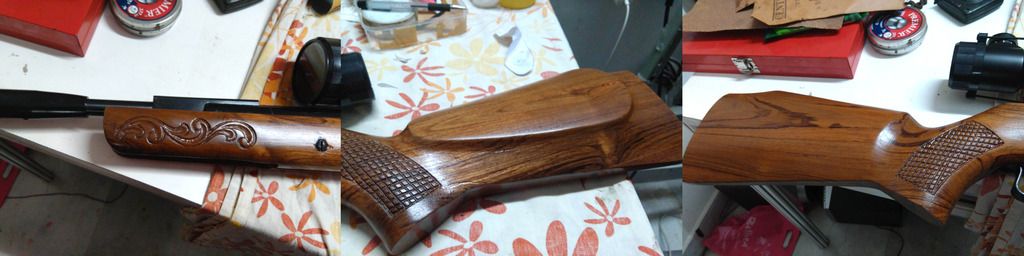
The Stock
The stock is teak. This was the risky part. While driving to and from work, I noticed a road side carpenter whose work shop is a very small tin roofed room. However, I was mighty impressed with his workmanship (mind you, my observations were within the few seconds I drove past his shop with cars honking at my back). When I decided to change the stock, I decided to give this carpenter a try. He confirmed that this was the first time he was going to make something like this, but assured me he would do his best…and he did. With a little chipping here and there, the mechanism sat perfectly in the wood. The final touch of fine sand papering and Mat polish was done by my technician.
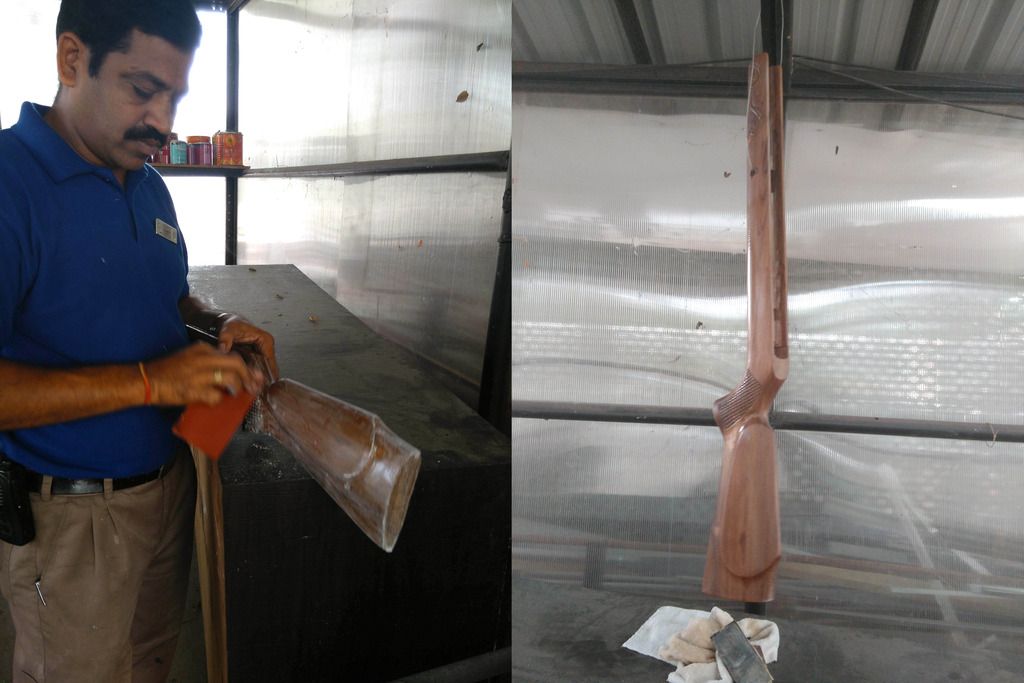
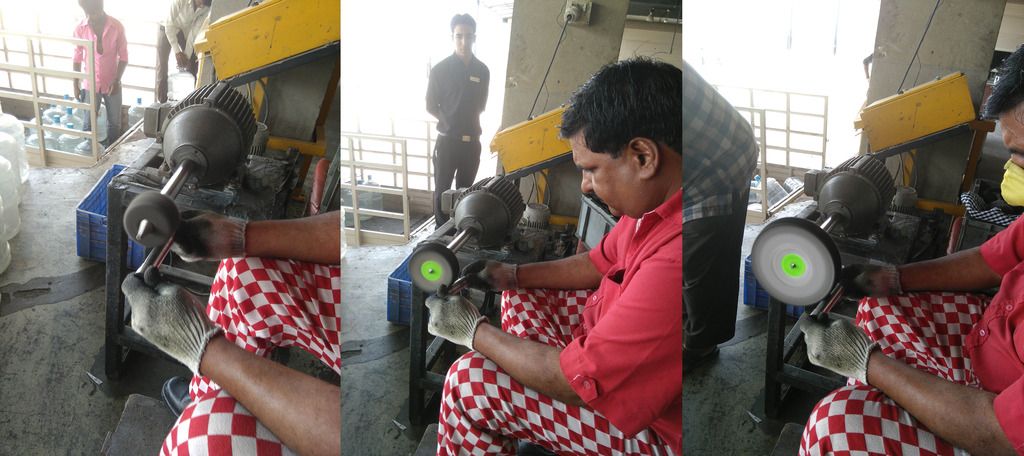
(I am blessed with a job in an organization that has a very large maintenance department, with very dynamic technicians who do not take “no” for an answer. The guy's in all the photos are technicians in their respective trades).
The Barrel
Of course, to achieve a carbine, I had to first look at the barrel. Decided to knock off a little more than 3 inches, bringing down the barrel length to 14 inches. As per Cardew, 10” of the barrel in necessary to generate power and 4 more to generate necessary pellet spin for better stability. Since I wanted this project to be top notch, I decided to rope in a machinist friend who is an expert with CNC machines. It was time to cut the barrel, and perhaps the greatest challenge was getting that perfect chamfer. After intricately lecturing him on the importance of perfect chamfering, this was the end result.
The figure on the right is the original barrel tip and the left is the chamfered barrel. An amazing job I must say.
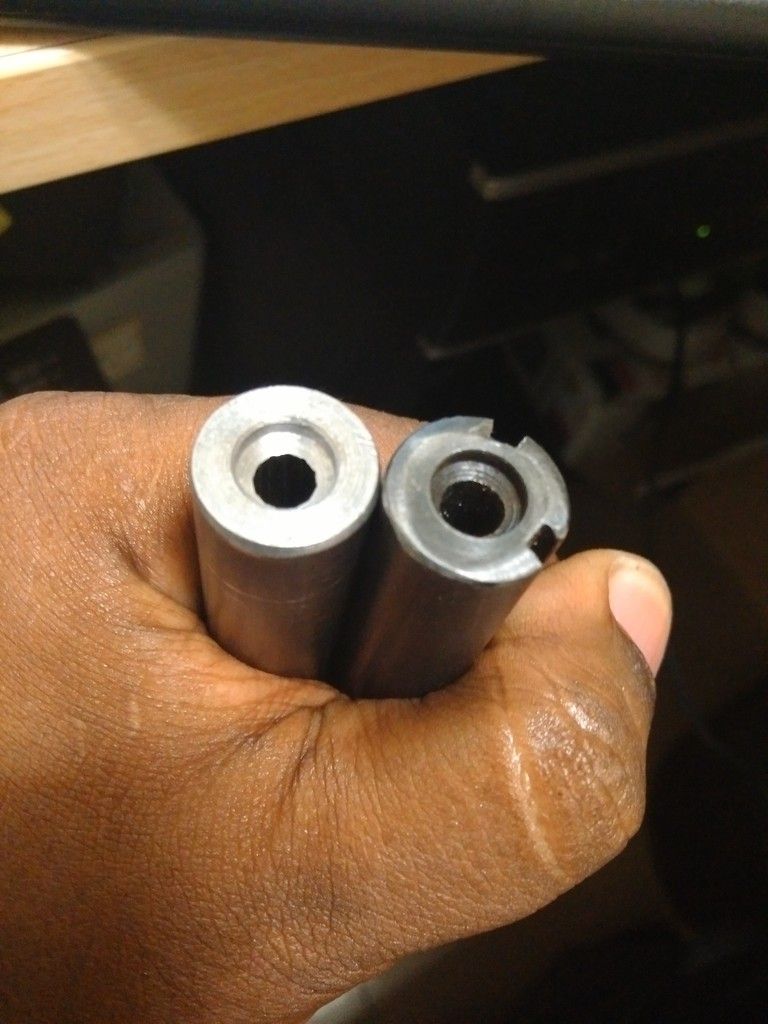
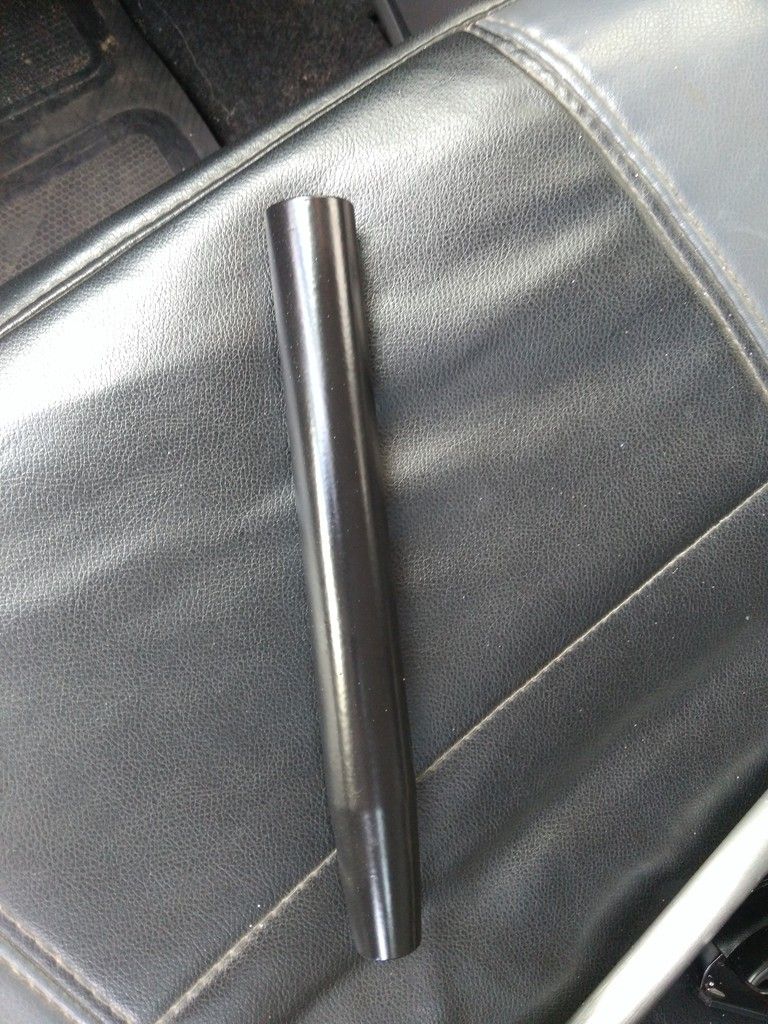
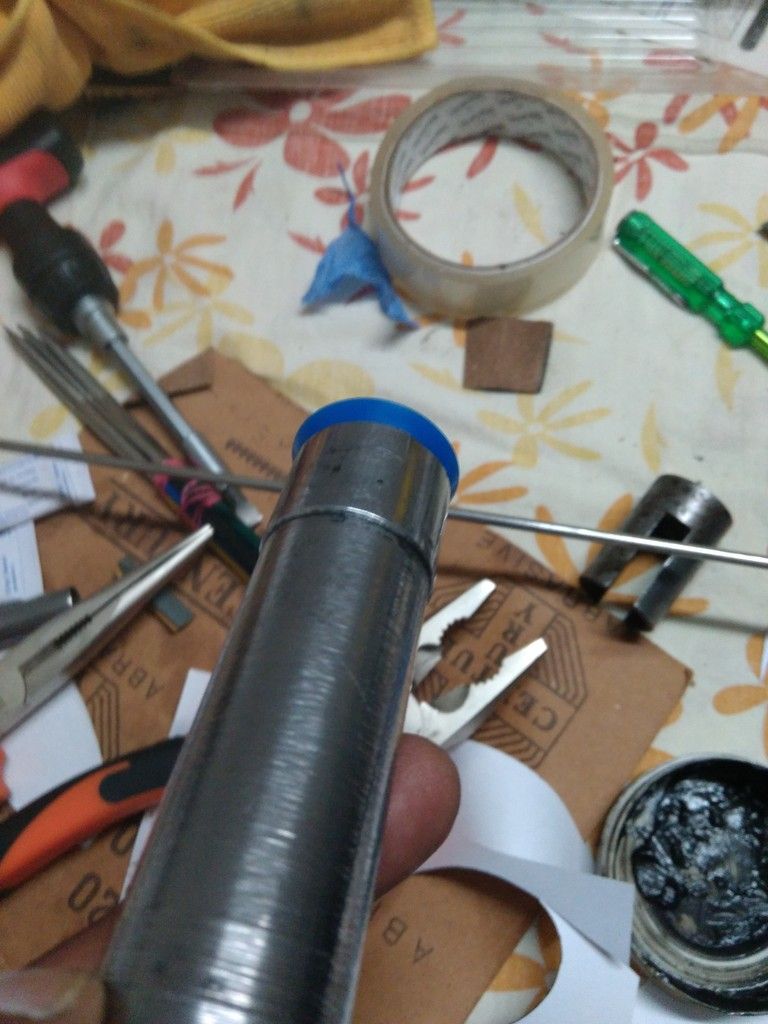
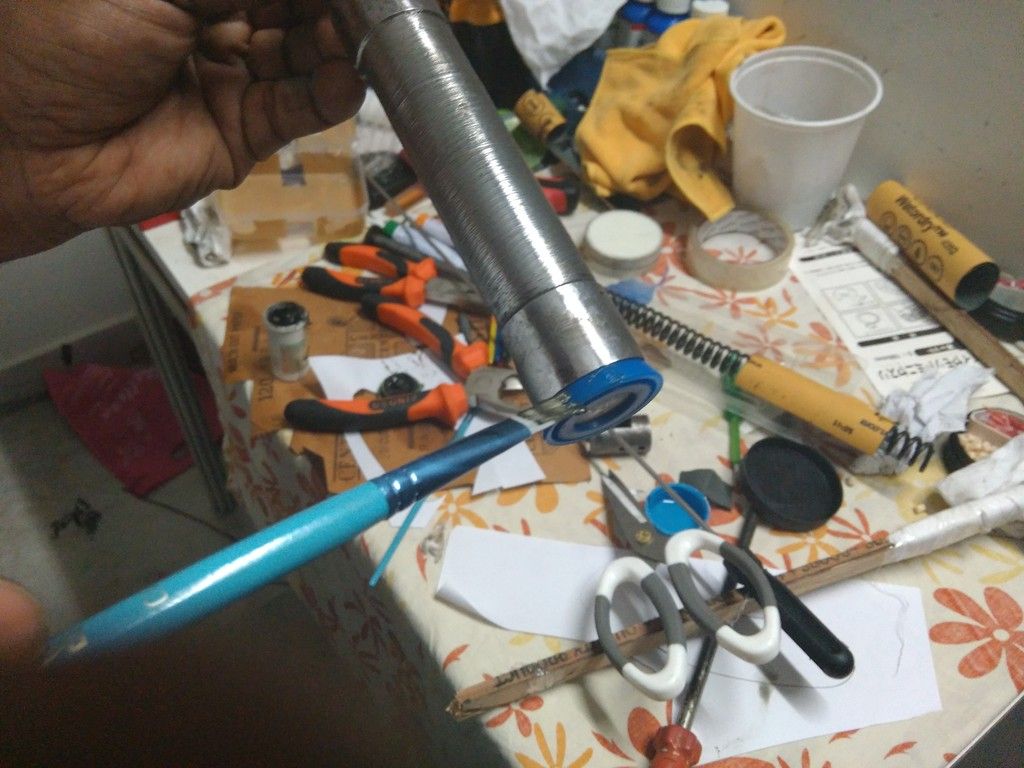
The Muzzle
This muzzle is made of aluminium A354 grade (please do not flay me if I’m wrong. This is what I was told. I’m a bummer when it comes to metallurgy). This aluminium is literally as strong as steel. Solid. I could break a coconut and not have a dent. Anyway took me almost 3 days to decide on the spec. Seemed simple till I got into it. The machining of the muzzle was done by the same machinist who did the barrel chamfering. He did this beautiful job. A brilliant guy I must say. He had a look at the bluing on the barrel and advised against bluing the muzzle since there would be lot of contact and sweat. He advised powder coating with a gloss finish.
Powder Coating???
Turns out he was right. Looks amazing and what’s great is, it’s scratch resistant. Apparently the process saw spraying and baking the muzzle in 270 degrees heat for 45 minutes.
I must mention here that I was tempted to make a muffler but decided against it as its not lawful.
Honesty pays! Oh…my taxes!!!!
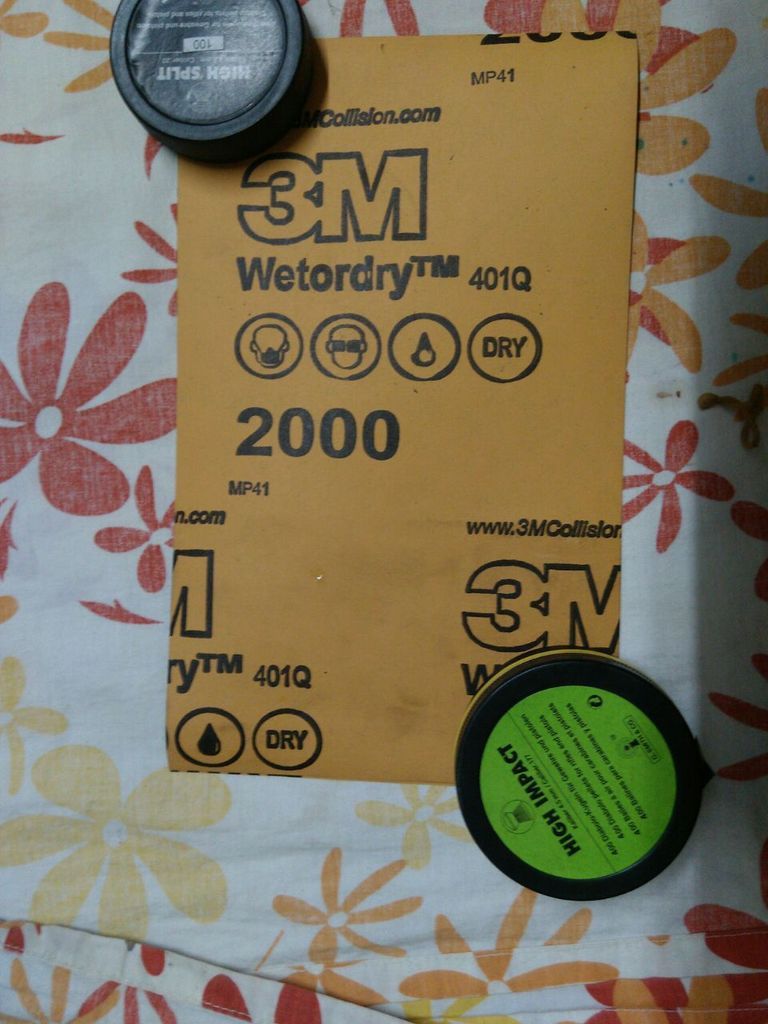
Now to the internals
The inner wall of the receiver was quiet good. Just to be double sure, I polished the internals with a 2000 grit sandpaper after thoroughly degreasing it.
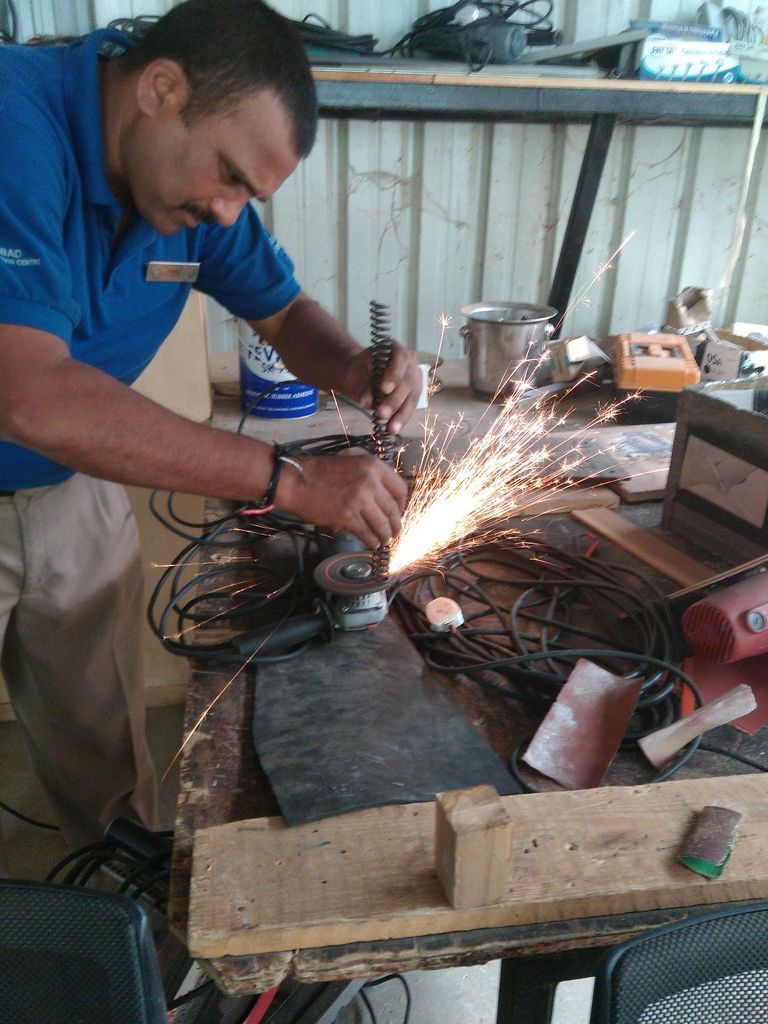
The ends of the spring needed some grinding and flattening. Again, my technicians came to the rescue. A well done job.
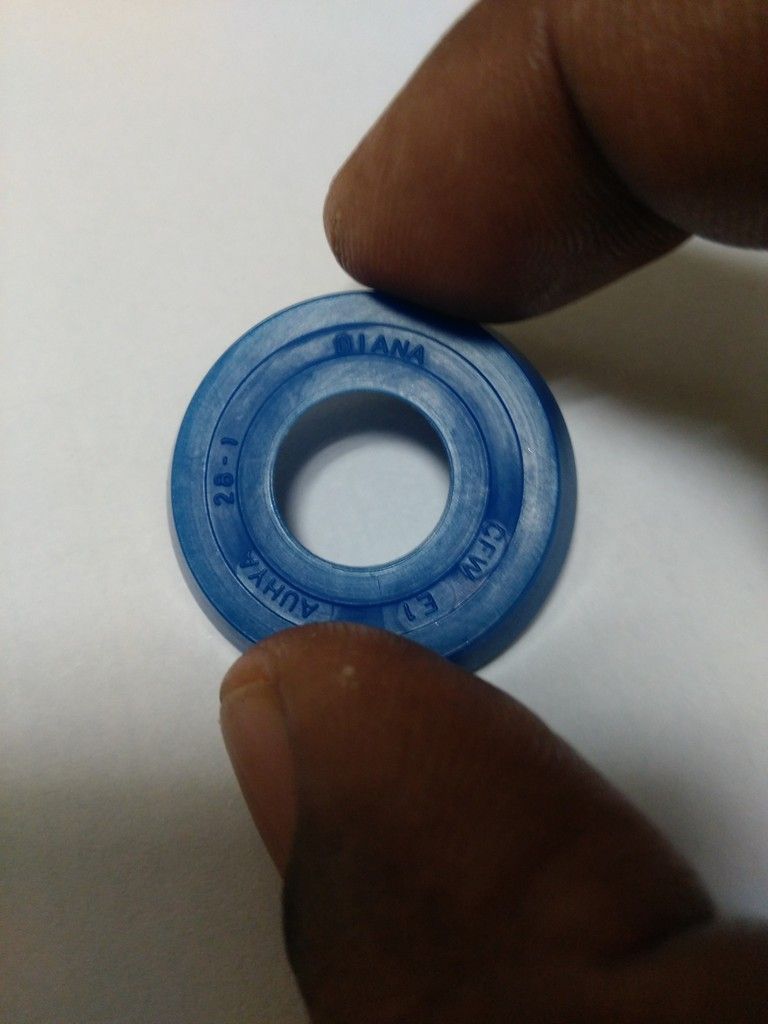
I am not a fan of leather washers. Ordered a Diana Seal from Kovibazaar.com. Cost a staggering Rs. 899 + 60 for courier charges.
I was tempted to replace the spring with a Diana spring but decided against it. Reason??? None!!!
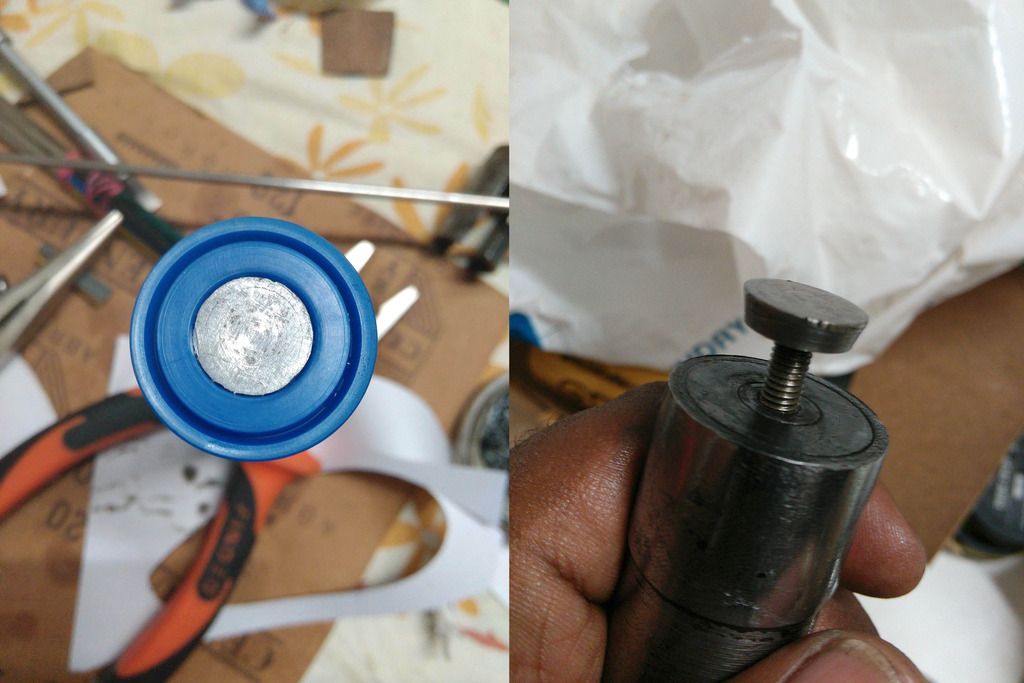
This TTI adaptor was borrowed from my Cannon 65.
I decided against sandpapering the piston. I wanted it buffed. This is the same technique used to buff silver and EPNS (Electro Plated Nickel Silver) dining wear. One can control the level of buffing to ensure it does not eat in to the metal. The pads used are from Scotch Brite type pads to super soft pads. Please note the different pads used.
Below is a pic taken after buffing.
I filed and polished the interface of the shear and trigger to a brilliant finish.

From the pics below, you will notice that the tolerance between the spring and piston wall is decent enough not to have a sleeve (IMHO).
Now the all important part of lubrication.
After thoroughly cleaning the entire internals with a generous amount of acetone, I applies a thin layer of Macuri molly to the spring. Not a heavy coat.
The piston was dressed with a thin layer of high grade molly too.
For the piston seal, I decided to experiment a little and make a new combo. A pinch of Molly and a drop of Crossman Silicon Chamber oil it would be. Again, a thin layer was applied using a brush.
The result is fantastic. I love this combo. Silk smooth. Not sure if the chemistry is right, but for now it’s great. Would recommend it (at your own risk of course).
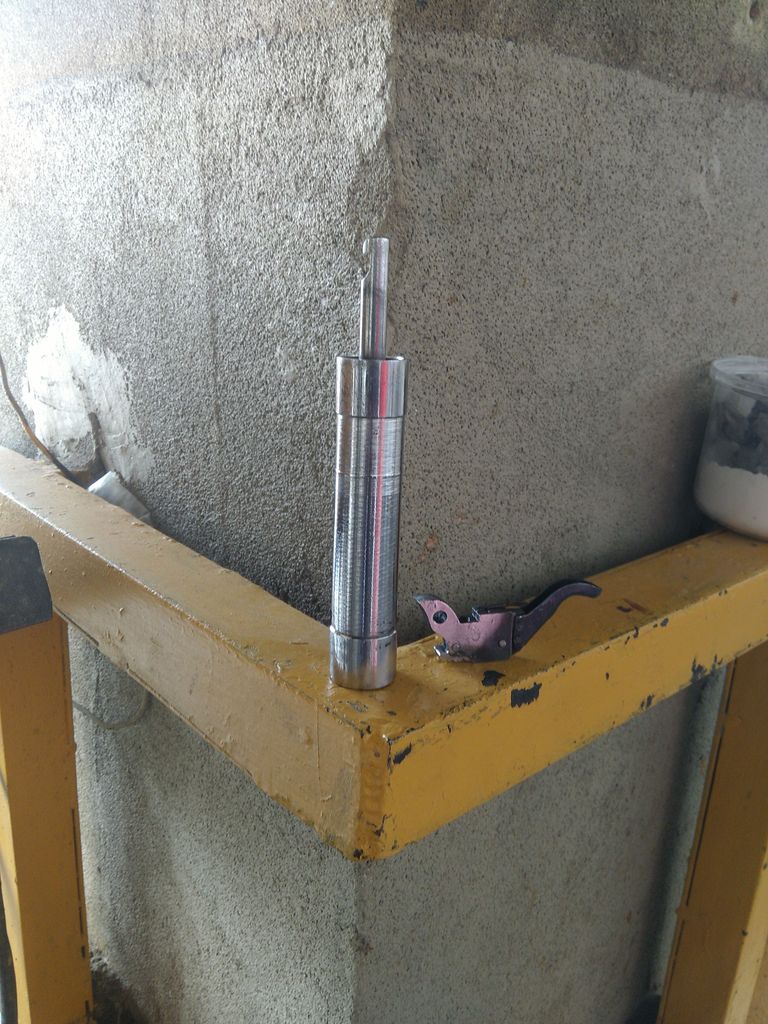
Re assembly was a breeze thanks to the spring compressor.
Now the result is even better than the previous one (link attached above).
She is elegant, more powerful and accurate. Below are two sheets at exactly 10 meters, muzzle to target. BENCH REST POSITION. This was shot after the necessary scope adjustments. 5 shot groups each.
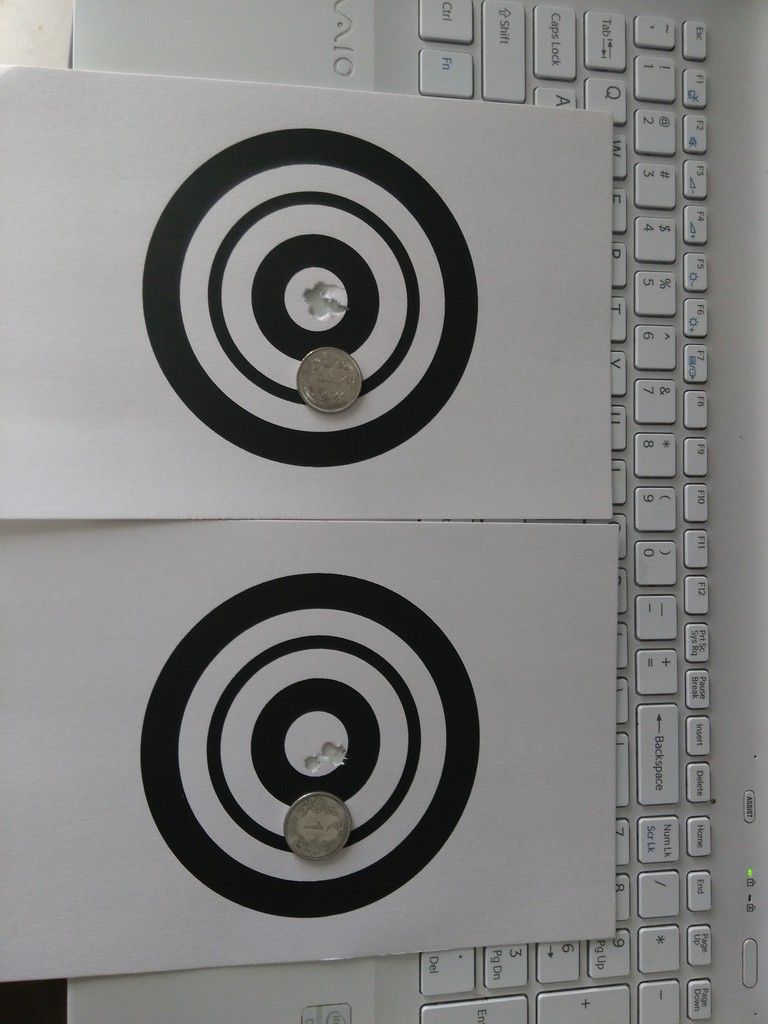
I am eager to test her at 20 and 30 meters but can’t find the time right now. Will surely do it in future and update the forum.
Man….now I already feel like George Bernard Shaw (author of My Fair Lady).
P.s
In all this, the greatest pleasure I derived was my 10 year old daughter helping me with little chores. I’m glad she’s showing interest in shooting. She’s just become a life time member of the Telangana Rifle Association……a father’s pride. 

BD
Both threads merged - moderator
I would like to refer to the first three points I made in the previous post with a little modification to the third.
Firstly, I would like to make it very clear that all opinions in this post are mine based on my experience.
Secondly, I do not represent, support, promote, demote or market any ones opinions or any air rifle brand.
Thirdly, this post is about a product I have worked on and tweaked to a level that I feel comfortable with, and might or might not necessarily be to its full potential.
Please forgive me for my messy work station as you will witness in some pics.
I had talked about the SDB Classic SE (Special Edition). As I had mentioned, this particular gun, kind of drew my attention. After the initial review, my fingers and mind kept twitching, knowing there was more to this gun than what was present.
I decided to tune and “tweak” the gun to bring out its full potential, both in performance and lust.The improved SDB was going to be a carbine version.
Inspired by the age old classic “My Fair Lady” I set on my quest.
For Gen X members of the forum, this is an all-time classic where a low class woman is “transformed” in to a sophisticated lady, both look wise (this is where I decided the look of the rifle needs an upgrade) and character wise (the internals needed to be re-worked).
I’m sure the older folks have that little curl up their lips…..yes…My fair lady, Sound of music…Gone with the wind…my my…I’m getting diverted…nostalgia.
Armed with a plan in mind, dismantled the rifle. I was in for a rude shock. The internals looked like a bombed out war zone.
How on earth did this rifle perform so well?
The moment I saw the internal, I was excited. There was definitely scope to outperform its already great performance.
This Lady is the SDB Classic Special Edition in her original self (first review).
The same Lady after refinement
Now, lets look into what went into her transformation.
Firstly the externals.
The Stock
The stock is teak. This was the risky part. While driving to and from work, I noticed a road side carpenter whose work shop is a very small tin roofed room. However, I was mighty impressed with his workmanship (mind you, my observations were within the few seconds I drove past his shop with cars honking at my back). When I decided to change the stock, I decided to give this carpenter a try. He confirmed that this was the first time he was going to make something like this, but assured me he would do his best…and he did. With a little chipping here and there, the mechanism sat perfectly in the wood. The final touch of fine sand papering and Mat polish was done by my technician.
(I am blessed with a job in an organization that has a very large maintenance department, with very dynamic technicians who do not take “no” for an answer. The guy's in all the photos are technicians in their respective trades).
The Barrel
Of course, to achieve a carbine, I had to first look at the barrel. Decided to knock off a little more than 3 inches, bringing down the barrel length to 14 inches. As per Cardew, 10” of the barrel in necessary to generate power and 4 more to generate necessary pellet spin for better stability. Since I wanted this project to be top notch, I decided to rope in a machinist friend who is an expert with CNC machines. It was time to cut the barrel, and perhaps the greatest challenge was getting that perfect chamfer. After intricately lecturing him on the importance of perfect chamfering, this was the end result.
The figure on the right is the original barrel tip and the left is the chamfered barrel. An amazing job I must say.
The Muzzle
This muzzle is made of aluminium A354 grade (please do not flay me if I’m wrong. This is what I was told. I’m a bummer when it comes to metallurgy). This aluminium is literally as strong as steel. Solid. I could break a coconut and not have a dent. Anyway took me almost 3 days to decide on the spec. Seemed simple till I got into it. The machining of the muzzle was done by the same machinist who did the barrel chamfering. He did this beautiful job. A brilliant guy I must say. He had a look at the bluing on the barrel and advised against bluing the muzzle since there would be lot of contact and sweat. He advised powder coating with a gloss finish.
Powder Coating???
Turns out he was right. Looks amazing and what’s great is, it’s scratch resistant. Apparently the process saw spraying and baking the muzzle in 270 degrees heat for 45 minutes.
I must mention here that I was tempted to make a muffler but decided against it as its not lawful.
Honesty pays! Oh…my taxes!!!!
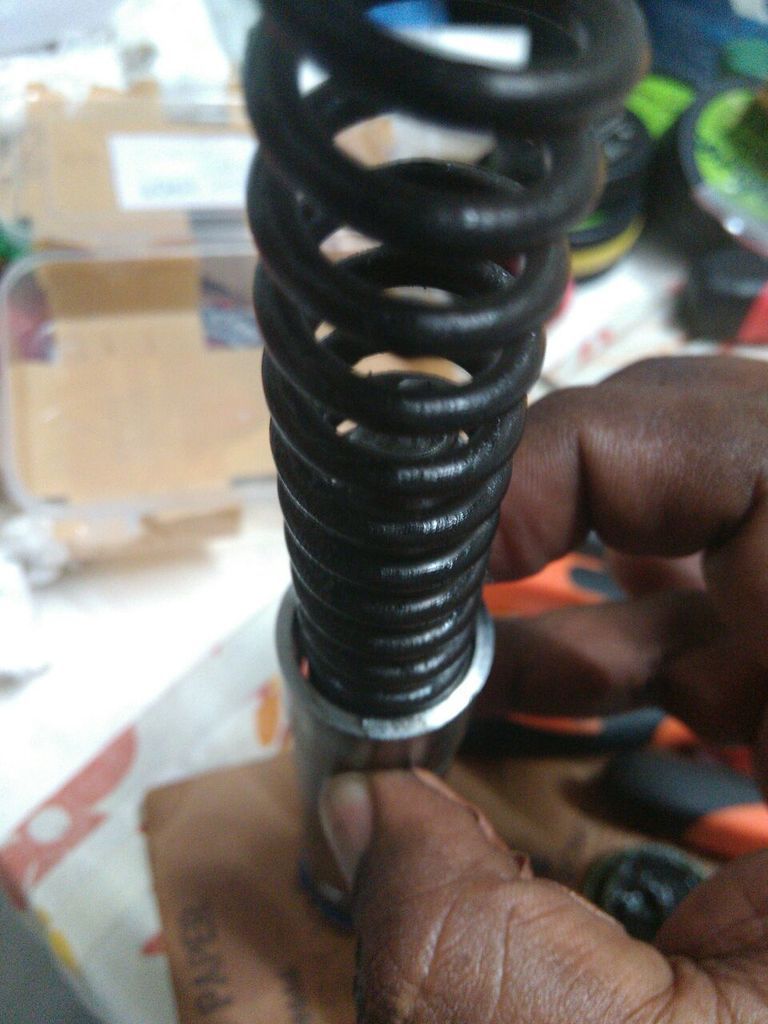
Now to the internals
The inner wall of the receiver was quiet good. Just to be double sure, I polished the internals with a 2000 grit sandpaper after thoroughly degreasing it.
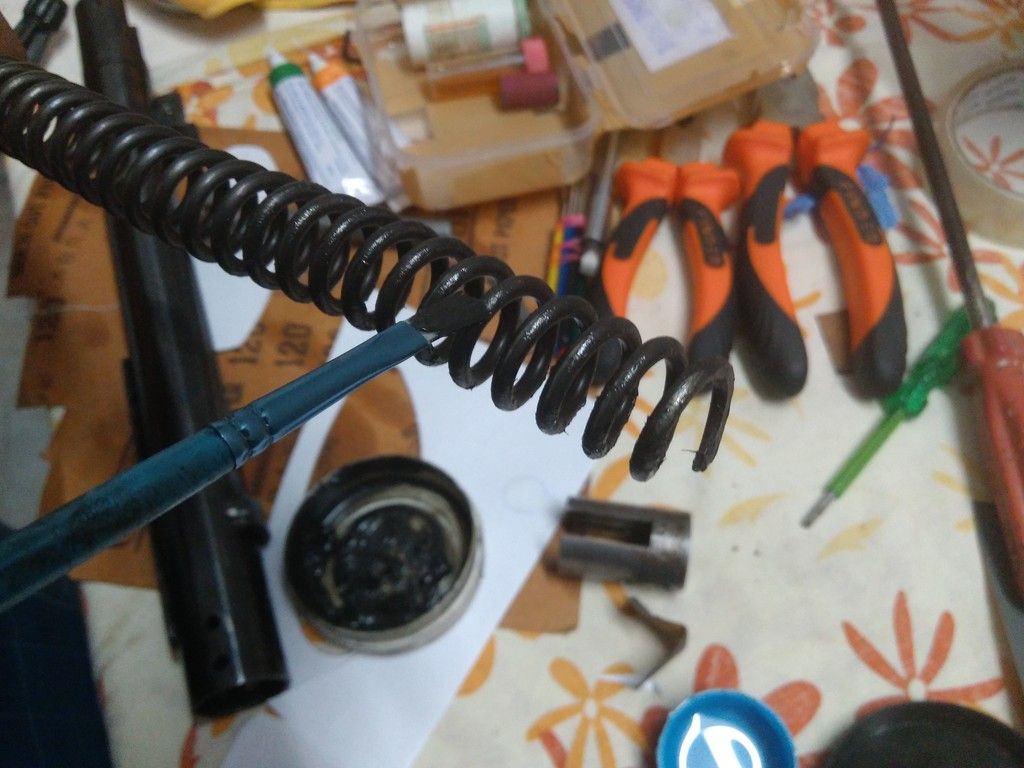
The ends of the spring needed some grinding and flattening. Again, my technicians came to the rescue. A well done job.
I am not a fan of leather washers. Ordered a Diana Seal from Kovibazaar.com. Cost a staggering Rs. 899 + 60 for courier charges.
I was tempted to replace the spring with a Diana spring but decided against it. Reason??? None!!!
This TTI adaptor was borrowed from my Cannon 65.
I decided against sandpapering the piston. I wanted it buffed. This is the same technique used to buff silver and EPNS (Electro Plated Nickel Silver) dining wear. One can control the level of buffing to ensure it does not eat in to the metal. The pads used are from Scotch Brite type pads to super soft pads. Please note the different pads used.
Below is a pic taken after buffing.
I filed and polished the interface of the shear and trigger to a brilliant finish.
From the pics below, you will notice that the tolerance between the spring and piston wall is decent enough not to have a sleeve (IMHO).
Now the all important part of lubrication.
After thoroughly cleaning the entire internals with a generous amount of acetone, I applies a thin layer of Macuri molly to the spring. Not a heavy coat.
The piston was dressed with a thin layer of high grade molly too.
For the piston seal, I decided to experiment a little and make a new combo. A pinch of Molly and a drop of Crossman Silicon Chamber oil it would be. Again, a thin layer was applied using a brush.
The result is fantastic. I love this combo. Silk smooth. Not sure if the chemistry is right, but for now it’s great. Would recommend it (at your own risk of course).
Re assembly was a breeze thanks to the spring compressor.
Now the result is even better than the previous one (link attached above).
She is elegant, more powerful and accurate. Below are two sheets at exactly 10 meters, muzzle to target. BENCH REST POSITION. This was shot after the necessary scope adjustments. 5 shot groups each.
I am eager to test her at 20 and 30 meters but can’t find the time right now. Will surely do it in future and update the forum.
Man….now I already feel like George Bernard Shaw (author of My Fair Lady).
P.s
In all this, the greatest pleasure I derived was my 10 year old daughter helping me with little chores. I’m glad she’s showing interest in shooting. She’s just become a life time member of the Telangana Rifle Association……a father’s pride.
BD
Last edited by Big Daddy on Sat Jul 18, 2015 9:37 pm, edited 2 times in total.
The early bird gets the worm, but the fact is, if the worm had woken up late, it would still be alive.
-
dr.jayakumar
- Veteran
- Posts: 1906
- Joined: Tue Apr 06, 2010 9:55 am
- Location: tamilnadu,india
Re: Th SDB Classic Special Edition Up Grade
that is a wonderful pieace of work,with right narration.
hats off friend
regards
dr.jk
hats off friend
regards
dr.jk
-
David
- On the way to nirvana

- Posts: 50
- Joined: Tue Mar 18, 2008 5:34 pm
- Location: Bangalore
- Contact:
Re: Th SDB Classic Special Edition Up Grade
Hi BD
You have a great team and good job. Very well done and explained. Enjoy shooting. I am very impressed on the workmanship.
Rgds
David
You have a great team and good job. Very well done and explained. Enjoy shooting. I am very impressed on the workmanship.
Rgds
David
-
pratik_mahale
- One of Us (Nirvana)
")
- Posts: 474
- Joined: Sun Jun 28, 2009 12:59 pm
- Location: mumbai
Re: Th SDB Classic Special Edition Up Grade
Superb job BD
Eagerly waiting for 20 & 30 meter result
Eagerly waiting for 20 & 30 meter result
-
pratik_mahale
- One of Us (Nirvana)
- Posts: 474
- Joined: Sun Jun 28, 2009 12:59 pm
- Location: mumbai
Re: Th SDB Classic Special Edition Up Grade
Just one question
Do you think Diana Seal is worth?
Do you think Diana Seal is worth?
-
Big Daddy
- Shooting true
- Posts: 536
- Joined: Fri Sep 18, 2009 6:54 pm
- Location: Hyderabad
Re: Th SDB Classic Special Edition Up Grade
Thanks Doc.dr.jayakumar wrote:that is a wonderful pieace of work,with right narration.
hats off friend
regards
dr.jk
BD
The early bird gets the worm, but the fact is, if the worm had woken up late, it would still be alive.
-
Big Daddy
- Shooting true
- Posts: 536
- Joined: Fri Sep 18, 2009 6:54 pm
- Location: Hyderabad
Re: Th SDB Classic Special Edition Up Grade
David wrote:Hi BD
You have a great team and good job. Very well done and explained. Enjoy shooting. I am very impressed on the workmanship.
Rgds
David
Thanks David. Yes a great team. Did not have the resources for laser checkering, hence had to settle for hand carving.
BD
The early bird gets the worm, but the fact is, if the worm had woken up late, it would still be alive.
-
Big Daddy
- Shooting true
- Posts: 536
- Joined: Fri Sep 18, 2009 6:54 pm
- Location: Hyderabad
Re: Th SDB Classic Special Edition Up Grade
pratik_mahale wrote:Just one question
Do you think Diana Seal is worth?
Thanks for your comments Pratik. I do think Diana seals are worth (IMHO).
Have a 10 year old diana with the same seal and 2 spring changes.
A friends seal has outlived 4 springs. Of all the seals i have used, i find this the best, provided its original. So many duplicates in the market.
BD
The early bird gets the worm, but the fact is, if the worm had woken up late, it would still be alive.
-
santhozp
- Fresh on the boat

- Posts: 9
- Joined: Mon Aug 19, 2013 8:16 am
Re: Th SDB Classic Special Edition Up Grade
Great job BD!
regards
Santhosh
regards
Santhosh
-
anubhav_rulez

- On the way to nirvana
- Posts: 75
- Joined: Mon Jul 18, 2011 4:22 am
- Location: Lucknow, U.P.
Re: Th SDB Classic Special Edition Up Grade
Beautiful. Awesome, fantastic, superb, great...these are the words coming in mind & not able to get my eyes off the beauty...hatsoff sir.
Anubhav Bajpai
------------------------------------------------------------------------------------
It's always better to have a gun & don't need it...Than need a gun & not having it !!!
------------------------------------------------------------------------------------
It's always better to have a gun & don't need it...Than need a gun & not having it !!!