BSA Mercury Mk2 restoration...
-
- One of Us (Nirvana)
- Posts: 263
- Joined: Mon Dec 05, 2011 4:13 pm
BSA Mercury Mk2 restoration...
been a long time..was busy on the domestic front.
got the BSA back from my nephew , and it was in a mess. so decided to do a basic , budget home restoration on it.
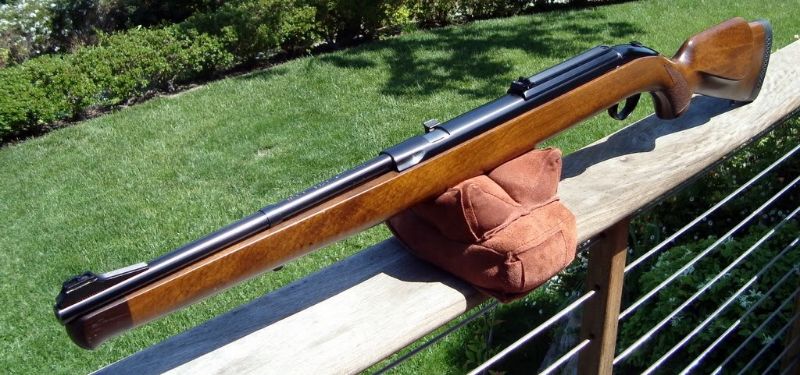
this is the BSA Mercury Mk2 in .22 with the ZB prefix before the serial number..which was made between 1974 and '78. the Mk1 was between 71 /73; there was also a MK3 between 79/80 followed by Mercury S/ Challanger which ( i think) went on till 81/82.
most of the paint.... the original MK2 was painted a deep black , not blued...had peeled off. so decided to remove all of it and repaint with a matt black finish. getting all the old paint was not easy but....
as i mentioned ..budget and basic...tried Bosny acrylic aerosol spray paint. i could not get any aerosol primer , so used an epoxy primer paint , again from Bosny as a base. took a few practice runs with it and after a few fumbles got going. pretty easy if one remembers to keep the can about a foot from the part to be painted. dries very fast and i applied the second coat of primer after half an hour. i sprayed the black colour the next day and followed it up with two more coats with one and two hour gaps respectively. left it for two days than rubbed it down with ballistol ( wonder why ???).
not too bad nor good and i doubt it will last long, but 'budget' is the key word ! an enamel spray with a regular primer will of course give a better finish. now if only durocoat firearm finish could be got here....
the barrel
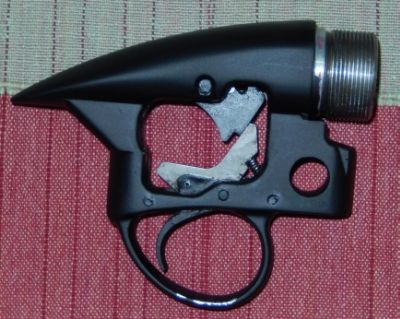
trigger unit... basic yet very beautifuly designed but a pita to assemble. the rough edges on the trigger guard is because i had hung it up on wire . will touch up later.
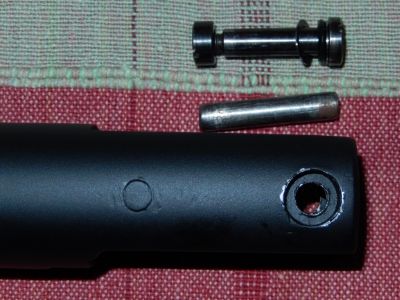
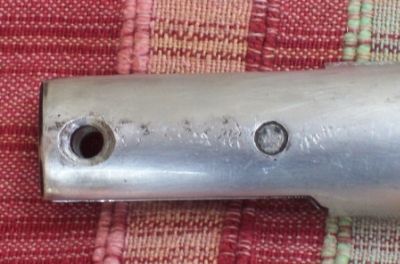
the Mk2 had a pin as the barrel hinge, which was not good as the pins tended to loosen over time. on the Mk3 BSA had put in a bolt and nut. sourced these and a couple of other minor parts from ChambersTW ( got them in exactly a week ). did the drilling and the counter drilling at home. pretty satisfied...and do those high speed drills jump !!
will be replacing the stock screws and washers with bucket washers and allen screws. have always found them better
the stock is in very bad shape and will need a lot of work. the front screw inlets are badly worn in BUT all that will be in phase 2.
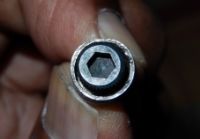
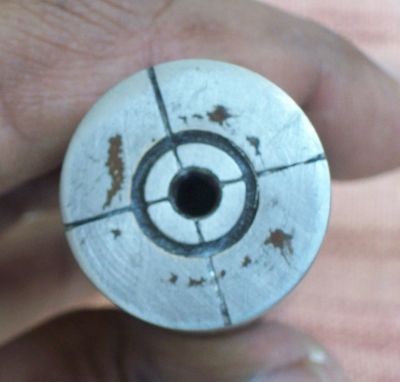
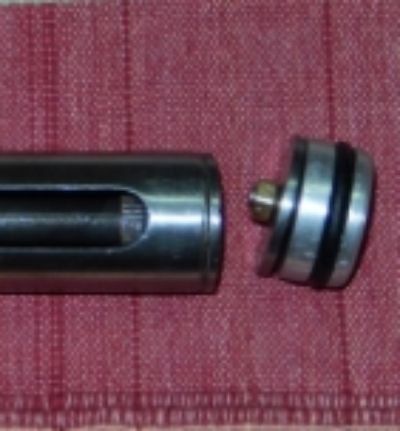
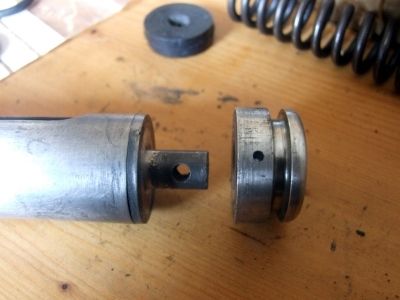
i had done this mod a while back. the original piston ( 1st picture below) has the piston latch come through the face of the piston and the piston head attached to it with a pin. the thick washer in the background fits in between the piston head and piston face. now the picture below is of a professionally done job , where the part that comes through the face is cut down , the piston head rotated 90 degrees and a new hole drilled through both to seat the head ( without washer ) with the pin. my mod was done in the days before the internet.....so i lopped of all, drilled a hole down the latch and piston head ,so that i could screw it in. all to get more swept volume !!the Mercury is a 10 ft lb gun from factory and i guess i must have got a ft lb more. BUT with a Beast main spring the gun was perfect in that power. the mod is in no way unsafe.( in the 3rd picture the bolt on the screw is to just hold the washer so that i do not loose it ).
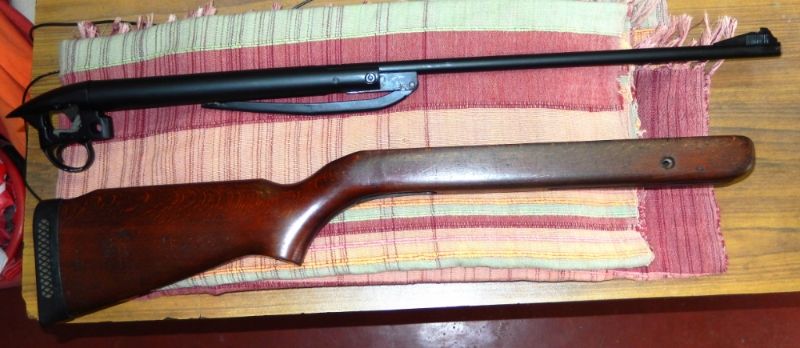
job 1 over ( for now ). the white marks on the breach block and barrel are molly.job 3 , work on the stock and job 4 redo the entire job 1 with quality paint !!
job 2 i will be putting in a new kit from Woodfield GCP..only place i could find a Mercury kit. http://woodfield-gcp.co.uk/?product=1636. Chambers and Knibbs have kits ...mass produced though.( for those who knew Triths...Will , who owns Woodfield GCP was his UK dealer )
got the BSA back from my nephew , and it was in a mess. so decided to do a basic , budget home restoration on it.
this is the BSA Mercury Mk2 in .22 with the ZB prefix before the serial number..which was made between 1974 and '78. the Mk1 was between 71 /73; there was also a MK3 between 79/80 followed by Mercury S/ Challanger which ( i think) went on till 81/82.
most of the paint.... the original MK2 was painted a deep black , not blued...had peeled off. so decided to remove all of it and repaint with a matt black finish. getting all the old paint was not easy but....
as i mentioned ..budget and basic...tried Bosny acrylic aerosol spray paint. i could not get any aerosol primer , so used an epoxy primer paint , again from Bosny as a base. took a few practice runs with it and after a few fumbles got going. pretty easy if one remembers to keep the can about a foot from the part to be painted. dries very fast and i applied the second coat of primer after half an hour. i sprayed the black colour the next day and followed it up with two more coats with one and two hour gaps respectively. left it for two days than rubbed it down with ballistol ( wonder why ???).
not too bad nor good and i doubt it will last long, but 'budget' is the key word ! an enamel spray with a regular primer will of course give a better finish. now if only durocoat firearm finish could be got here....
the barrel
trigger unit... basic yet very beautifuly designed but a pita to assemble. the rough edges on the trigger guard is because i had hung it up on wire . will touch up later.
the Mk2 had a pin as the barrel hinge, which was not good as the pins tended to loosen over time. on the Mk3 BSA had put in a bolt and nut. sourced these and a couple of other minor parts from ChambersTW ( got them in exactly a week ). did the drilling and the counter drilling at home. pretty satisfied...and do those high speed drills jump !!
will be replacing the stock screws and washers with bucket washers and allen screws. have always found them better
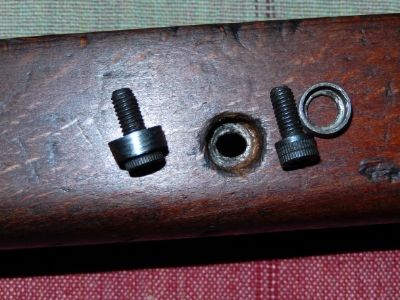
the stock is in very bad shape and will need a lot of work. the front screw inlets are badly worn in BUT all that will be in phase 2.
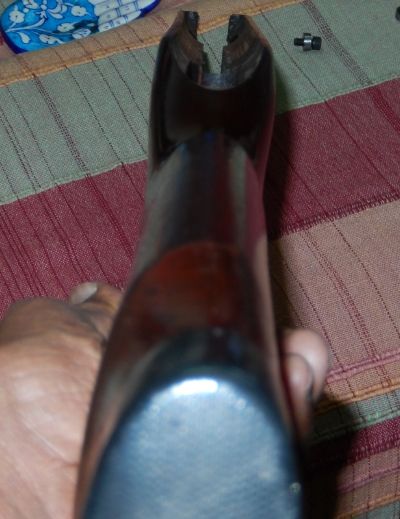
i had done this mod a while back. the original piston ( 1st picture below) has the piston latch come through the face of the piston and the piston head attached to it with a pin. the thick washer in the background fits in between the piston head and piston face. now the picture below is of a professionally done job , where the part that comes through the face is cut down , the piston head rotated 90 degrees and a new hole drilled through both to seat the head ( without washer ) with the pin. my mod was done in the days before the internet.....so i lopped of all, drilled a hole down the latch and piston head ,so that i could screw it in. all to get more swept volume !!the Mercury is a 10 ft lb gun from factory and i guess i must have got a ft lb more. BUT with a Beast main spring the gun was perfect in that power. the mod is in no way unsafe.( in the 3rd picture the bolt on the screw is to just hold the washer so that i do not loose it ).
job 1 over ( for now ). the white marks on the breach block and barrel are molly.job 3 , work on the stock and job 4 redo the entire job 1 with quality paint !!
job 2 i will be putting in a new kit from Woodfield GCP..only place i could find a Mercury kit. http://woodfield-gcp.co.uk/?product=1636. Chambers and Knibbs have kits ...mass produced though.( for those who knew Triths...Will , who owns Woodfield GCP was his UK dealer )
Throw me to the wolves....I will return leading the pack.
- AnandNair
- Almost at nirvana
- Posts: 220
- Joined: Sat Jul 27, 2013 7:46 am
- Location: Pathankot
Re: BSA Mercury Mk2 restoration...
Real Good work Mr. Mercury. I also tried my hands at restoring a BSA Airsporter mk1. The triggers on these are much much better than what we have in many new rifles.
Some learn by reading. A few by observation. The rest of 'em have to pee on the electric fence.
-
- Fresh on the boat
- Posts: 6
- Joined: Sun Oct 19, 2014 3:35 am
Re: BSA Mercury Mk2 restoration...
Very nicely done
-
- Shooting true
- Posts: 930
- Joined: Sun Mar 03, 2013 7:30 pm
Re: BSA Mercury Mk2 restoration...
Inspiring! Thanks for sharing.
-
- On the way to nirvana
- Posts: 78
- Joined: Fri Nov 23, 2012 11:27 am
Re: BSA Mercury Mk2 restoration...
nice rifle
- brihacharan
- Old Timer
- Posts: 3112
- Joined: Fri Jan 22, 2010 3:33 pm
- Location: mumbai
Re: BSA Mercury Mk2 restoration...
Wow! Excellent DIY in restoring the BSA Mercury Mk2
I feel that the Bosny treatment could have been avoided - since the receiver was polished well - a few coats of Ballistol would have given the AR an even matte finish.....
BTW - I had the receiver of my IHP35 powder coated - which till date has held on well! It cost me Rs.75/= 3 years ago.
A job well done Mercury.....
Would be interested to see a few groupings @ 30 & 50ft if you can post the results....
Briha
- estousandy
- One of Us (Nirvana)
- Posts: 399
- Joined: Fri Oct 23, 2009 3:41 pm
- Location: KL
Re: BSA Mercury Mk2 restoration...
Great work!
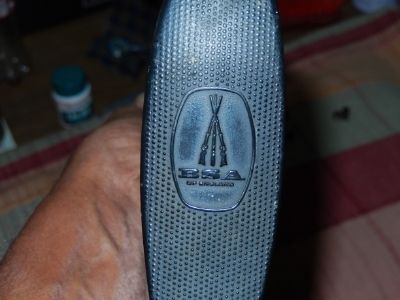
These classic rifle butts, atleast to me, looks & feel much better than the in-your-face cheekpad design of the newer crop of ARs.
with guns we are citizens, without we are subjects
-
- One of Us (Nirvana)
- Posts: 263
- Joined: Mon Dec 05, 2011 4:13 pm
Re: BSA Mercury Mk2 restoration...
thank you gentleman...nothing like having ones favorite rifle up and shooting. magnum springers are great to shoot but there is an effortless ease in shooting a light weight, less hold sensetive 12 ft lb air rifle, which the Mercury is. i have a long way to go though...install the new kit and a ton of work on the stock.
Anand Nair the BSA Airsporters were very well designed / engineered. i remember an early model ( may have been the Mk1) the tap loader would open when the underlever was cocked ! introduced in the mid 1950s, they preceded the Mercury and had new varients even after the Mercury went out of production in the early 80's. there was the Airsporter Stutzen,( 90's ) which to me is the finest looking air rifle(followed closely by the AA Prosport).
BSA Stutzen ( courtesy Internet )
Briha , i had the paint and the stripped rifle..you know how it is !! actually, this was more a dry run till i get the better paint. two clarifications from you...
there was a post by you on using local materials...coconut , neem and linseed oils... for gun stock care. i am comfortable with the procedure but some elaboration on the materials would be helpful....
you have a Diana rear sight on your Samurai...did you have to tap any new holes on the barrel to seat the Diana sight ?? or is the Ihp rear sight an exact match to the Diana ?? I ask because i have replaced the BSA rear sight ( too boxy looking ) with an Ihp rear sight. if i find a Diana rear sight i would like to replace the Ihp sight without having to drill into the barrel again. Thanks.
can not agree with you more Estousandy..the long stocks and subtle cheek pads were the era of open sights . guess as scopes became more popular the cheek pads became more pronounced !
Throw me to the wolves....I will return leading the pack.
- dev
- Old Timer
- Posts: 2614
- Joined: Wed Jun 14, 2006 5:16 pm
- Location: New Delhi
Re: BSA Mercury Mk2 restoration...
beauty of an air rifle, think I wanted one of these for a while.
Regards,
Dev
Regards,
Dev
To ride, to speak up, to shoot straight.
- brihacharan
- Old Timer
- Posts: 3112
- Joined: Fri Jan 22, 2010 3:33 pm
- Location: mumbai
Re: BSA Mercury Mk2 restoration...
Hello Mercury,
> Yes I formulated my own "Oil" - 40ml Coconut Oil, 30ml Neem Oil & 30ml Linseed Oil - mixed them well & heated the mixture (not boiled)....
> Sanded the stock initially with 100 grit sandpaper followed by 200 & 400 grit.
> Applied walnut stain 2 coats, later applied the oil mixture 3 coats....allowed drying time of overnight after each coat....
> Finally a rub with 1000 grit sandpaper & applied Carnouba wax....
> Re: The rear sight I only enlarged the holes in the sight's base (this saved me from drilling the barrel) this I did at home using my portable drill....Now the original IHP screws were used to fix the sight!!!!
> All that was required was a bit of imagination & the willingness to sweat a bit (DIY).....the outcome is Nirvana
Cheers
Briha
-
- One of Us (Nirvana)
- Posts: 263
- Joined: Mon Dec 05, 2011 4:13 pm
Re: BSA Mercury Mk2 restoration...
thanks Briha
now to look for a Diana rear sight.
Throw me to the wolves....I will return leading the pack.
-
- One of Us (Nirvana)
- Posts: 263
- Joined: Mon Dec 05, 2011 4:13 pm
Re: BSA Mercury Mk2 restoration...
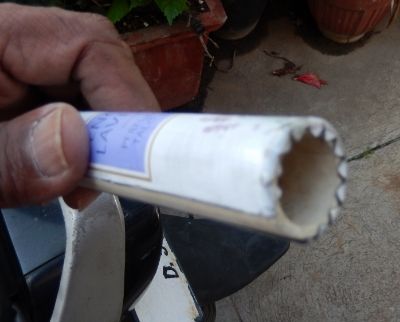
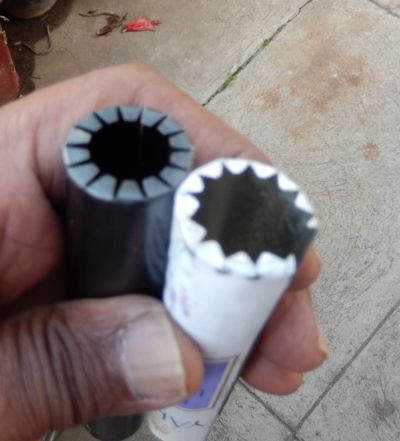
i had put in the old ( pretty thrashed ) spring rather than keep the gun idle till i received the new kit from Woodfield GCP. just recd. information that the kit may be delayed a bit.. so decided to experiment with a piston sleeve for the mercury.
there is really no need for a piston sleeve in a gun with an average length spring...a good fitting rear guide and top hat is pretty much sufficient to keep the spring aligned. the Mercury cocked very smoothly , but i did want to see if the addition of a sleeve would enhance it further. my friendly lathe shop would have gladly done it for me but it was a beautiful day here in Bangalore so a home DIY in the garden seemed perfect. a piston sleeve in conjunction with other major mods will give an increase in fps but that was not for the Mercury. i prefer it at the sub 12 ft lbs.
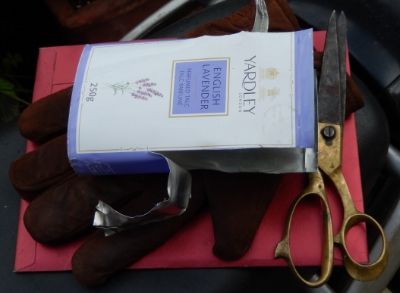
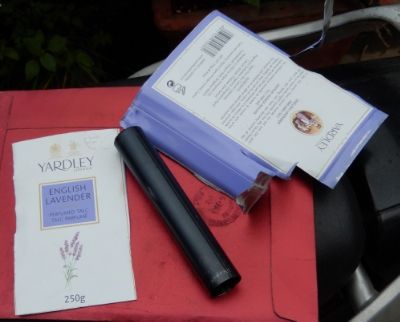
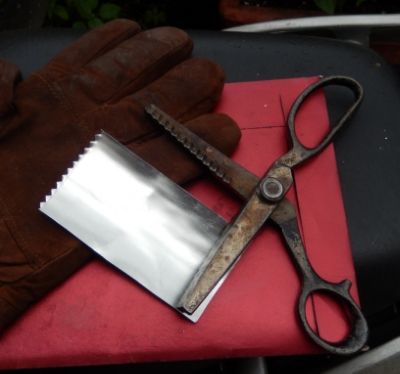
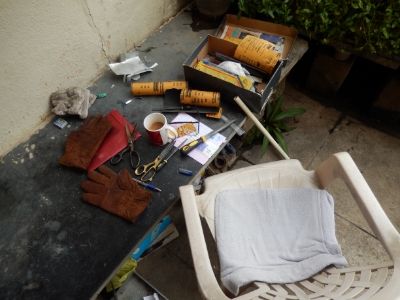
an old yardley powder tin , scissors , set of files , different grades of emery , the D350's piston sleeve ( removed to fit the Vortek PG2 kit) as a model, a pair of gloves for safety and i was set.
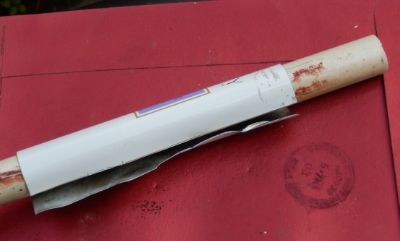
the easiest way is to a make a cut out with card board sized to the piston id and then work with the metal..but i had the piston in the gun and was too lazy to take it out. fortunately i have a lot of different size pvc pipes that fit the id of action , piston etc which at times i use as a dowel...so had the size of the piston. the powder tin was thin yet firm and strong enough...
cut out the required size
using the 350 sleeve as a sample
sizing it with the pvc pipe..
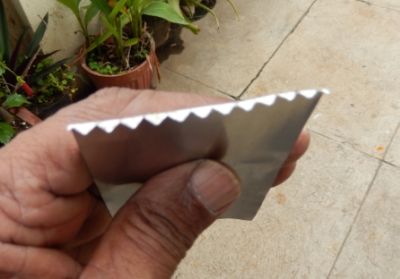
after sizing and smoothing the edges with the files and emery cut the top with a " zig zag scissors " ( don't have to )
as i mentioned ...beautiful day. my work table in the garden. and lots of coffee !!
bent the top over the edge of the "table "
fitted over a larger od pipe and tapped gently with a rubber hammer for roundness. tied and left for a couple of hours.
the 350 sleeve and the diy..
will fit in tomorrow and check it out....
Throw me to the wolves....I will return leading the pack.
- Basu
- Veteran
- Posts: 1483
- Joined: Wed Apr 08, 2009 7:14 pm
- Location: Salt Lake Kolkata
Re: BSA Mercury Mk2 restoration...
Wonderful DIY job !!
Superb finishing of sleeve !!
Waiting for more to unfold .......
Basu
Superb finishing of sleeve !!
Waiting for more to unfold .......
Basu
Not all those wander , are lost...............